
Hey! Have you heard?
Google Spreadsheets has been a staple tool used by countless companies and organizations for various usages. It's easy adaptability, flexibility and the encouragement of collaboration could very well be the reason for its wide adoption.
We'll have you know that you can do so much more with your Google Spreadsheets now, as it can be a database for your business. By using Sheetcrunch, you'll be able to generate your backend RESTful API in minutes, just by uploading your Google Spreadsheet onto the platform. It simply establishes a link between the system and your Google Spreadsheet, thus allowing you to perform data operations onto your data stored on that spreadsheet, returning you with well structured JSON responses!
Using this approach is a great way for a number reasons, and we'll list some of them here.
-
Generate backend API in minutes
-
Focus on how your business work rather than how to get it to work
-
A quick way of prototyping your next big idea
-
Save development cost
-
Speed up project development
-
Everything just works!
Excited yet? We are! Let's take you on a step by step guide on how to get setup right away!
Step 1 - Prepare your Google Spreadsheet
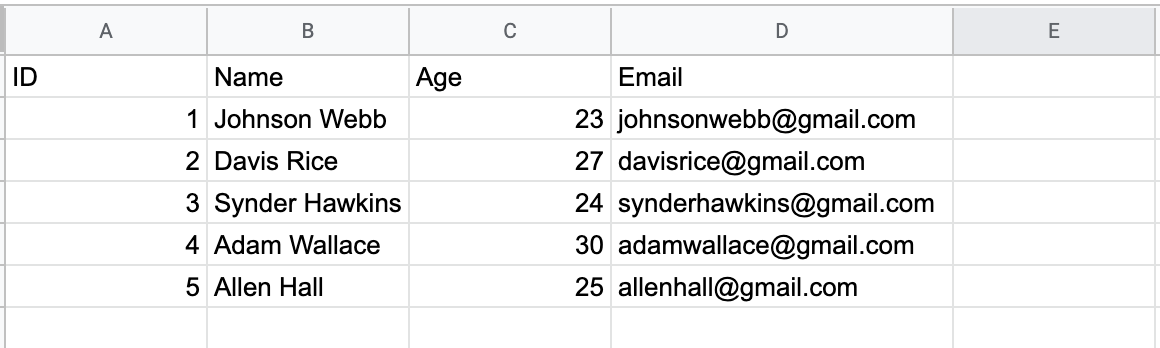
If you don't have an existing Google Spreadsheet, create one! Then, it's time to structure your spreadsheet AKA database. The first row will be treated as the column name for that particular column, and we generally suggest that you have an unique identifier to identify the different rows of data for easier data manipulation in the future.
You can checkout an example spreadsheet to give you a better idea on how to setup your structure.
Step 2 - Share it!
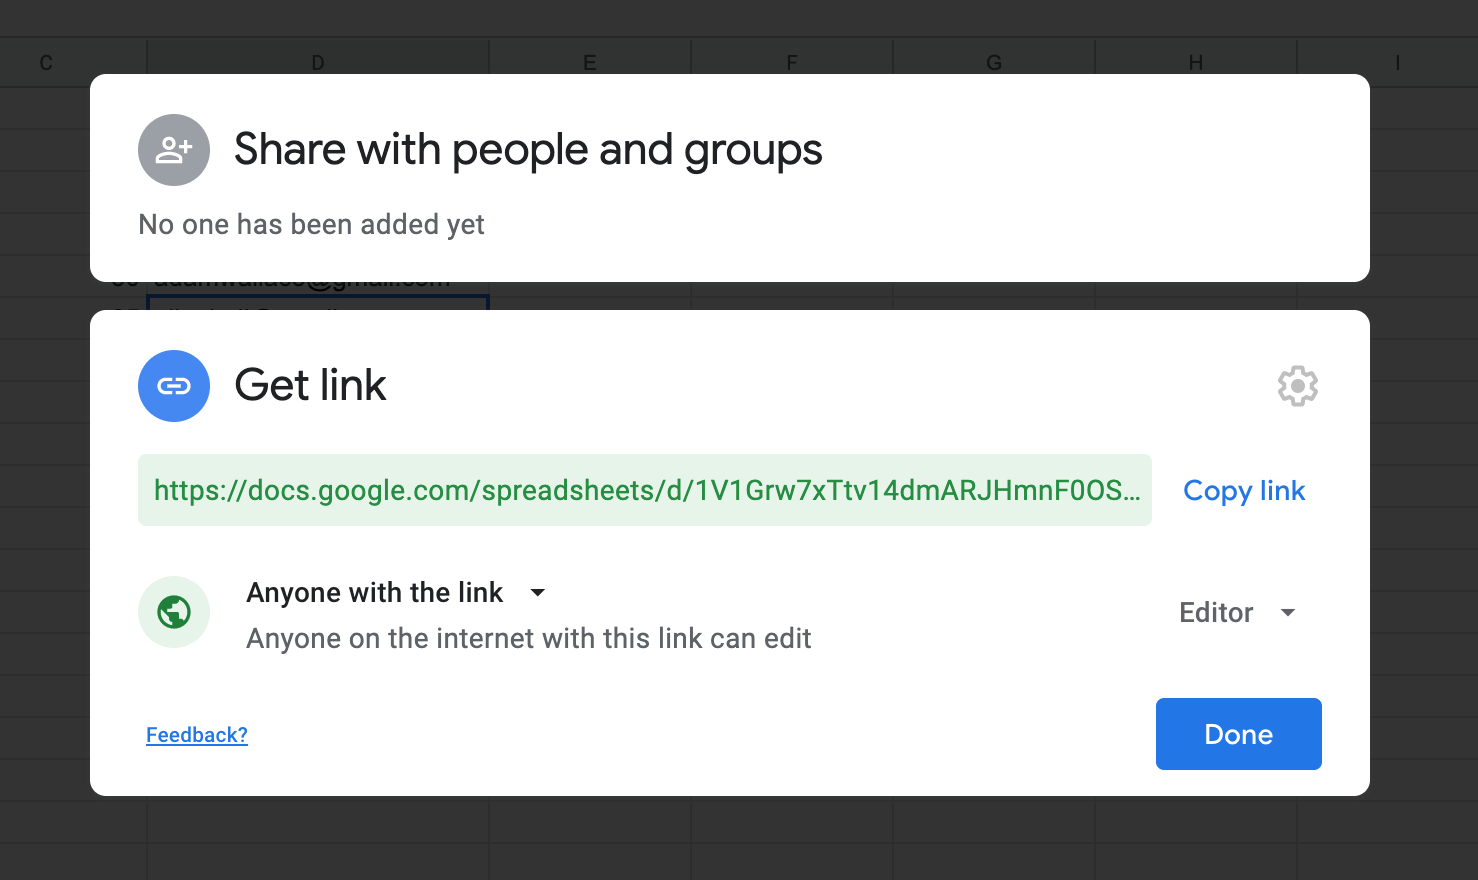
Remember to configure your shareable link with the "Editable" permission. To do this, simply adhere to the following steps :-
-
Click on the "Share" button
-
Click "Change" in the "Get Link" section
-
Make sure the "Anyone with the link" option is selected
-
Make sure the "Editor" option is selected
-
Click "Done"
And you're done with the setup of your spreadsheet. You need keep a copy of your spreadsheet URL as you'll need it later during API creation.

Step 3 - Create a Sheetcrunch Account!
Once you've setup your spreadsheet, it's time to create a Sheetcrunch account. Head on over to the sign up page to get started. Alternatively, you could just login if you already have an account.
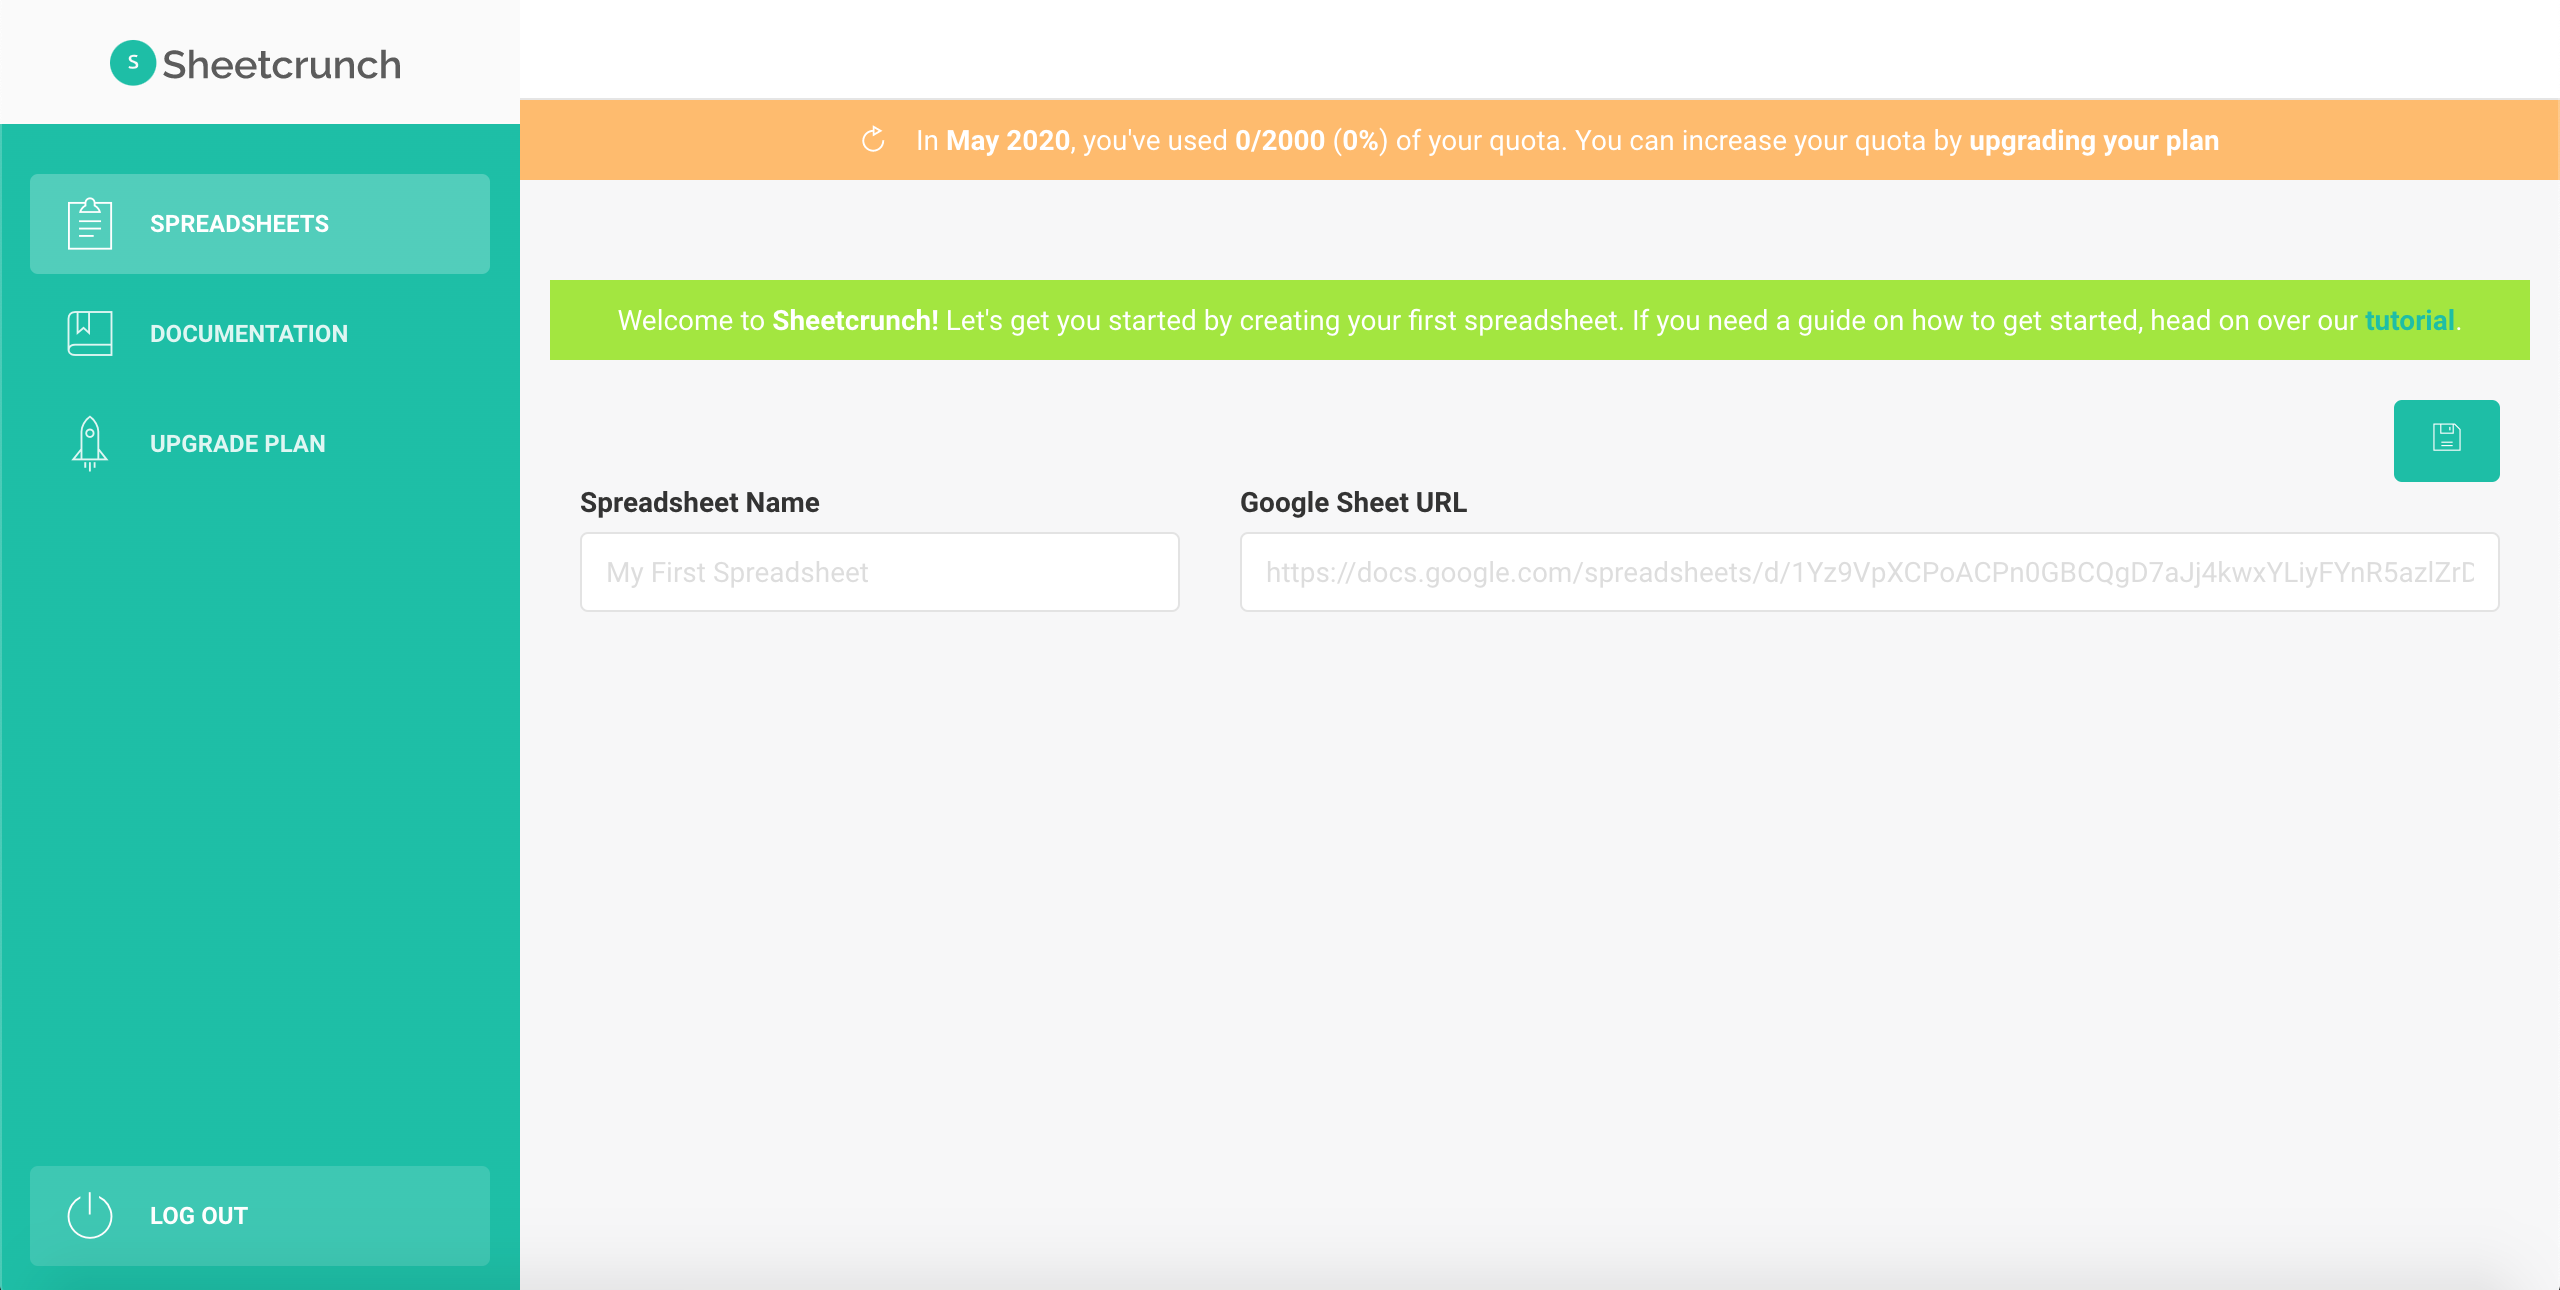
And you're in! You'll be presented with your spreadsheets page, but it's empty now, so start uploading your first spreadsheet!
Step 4 - Create Your First API
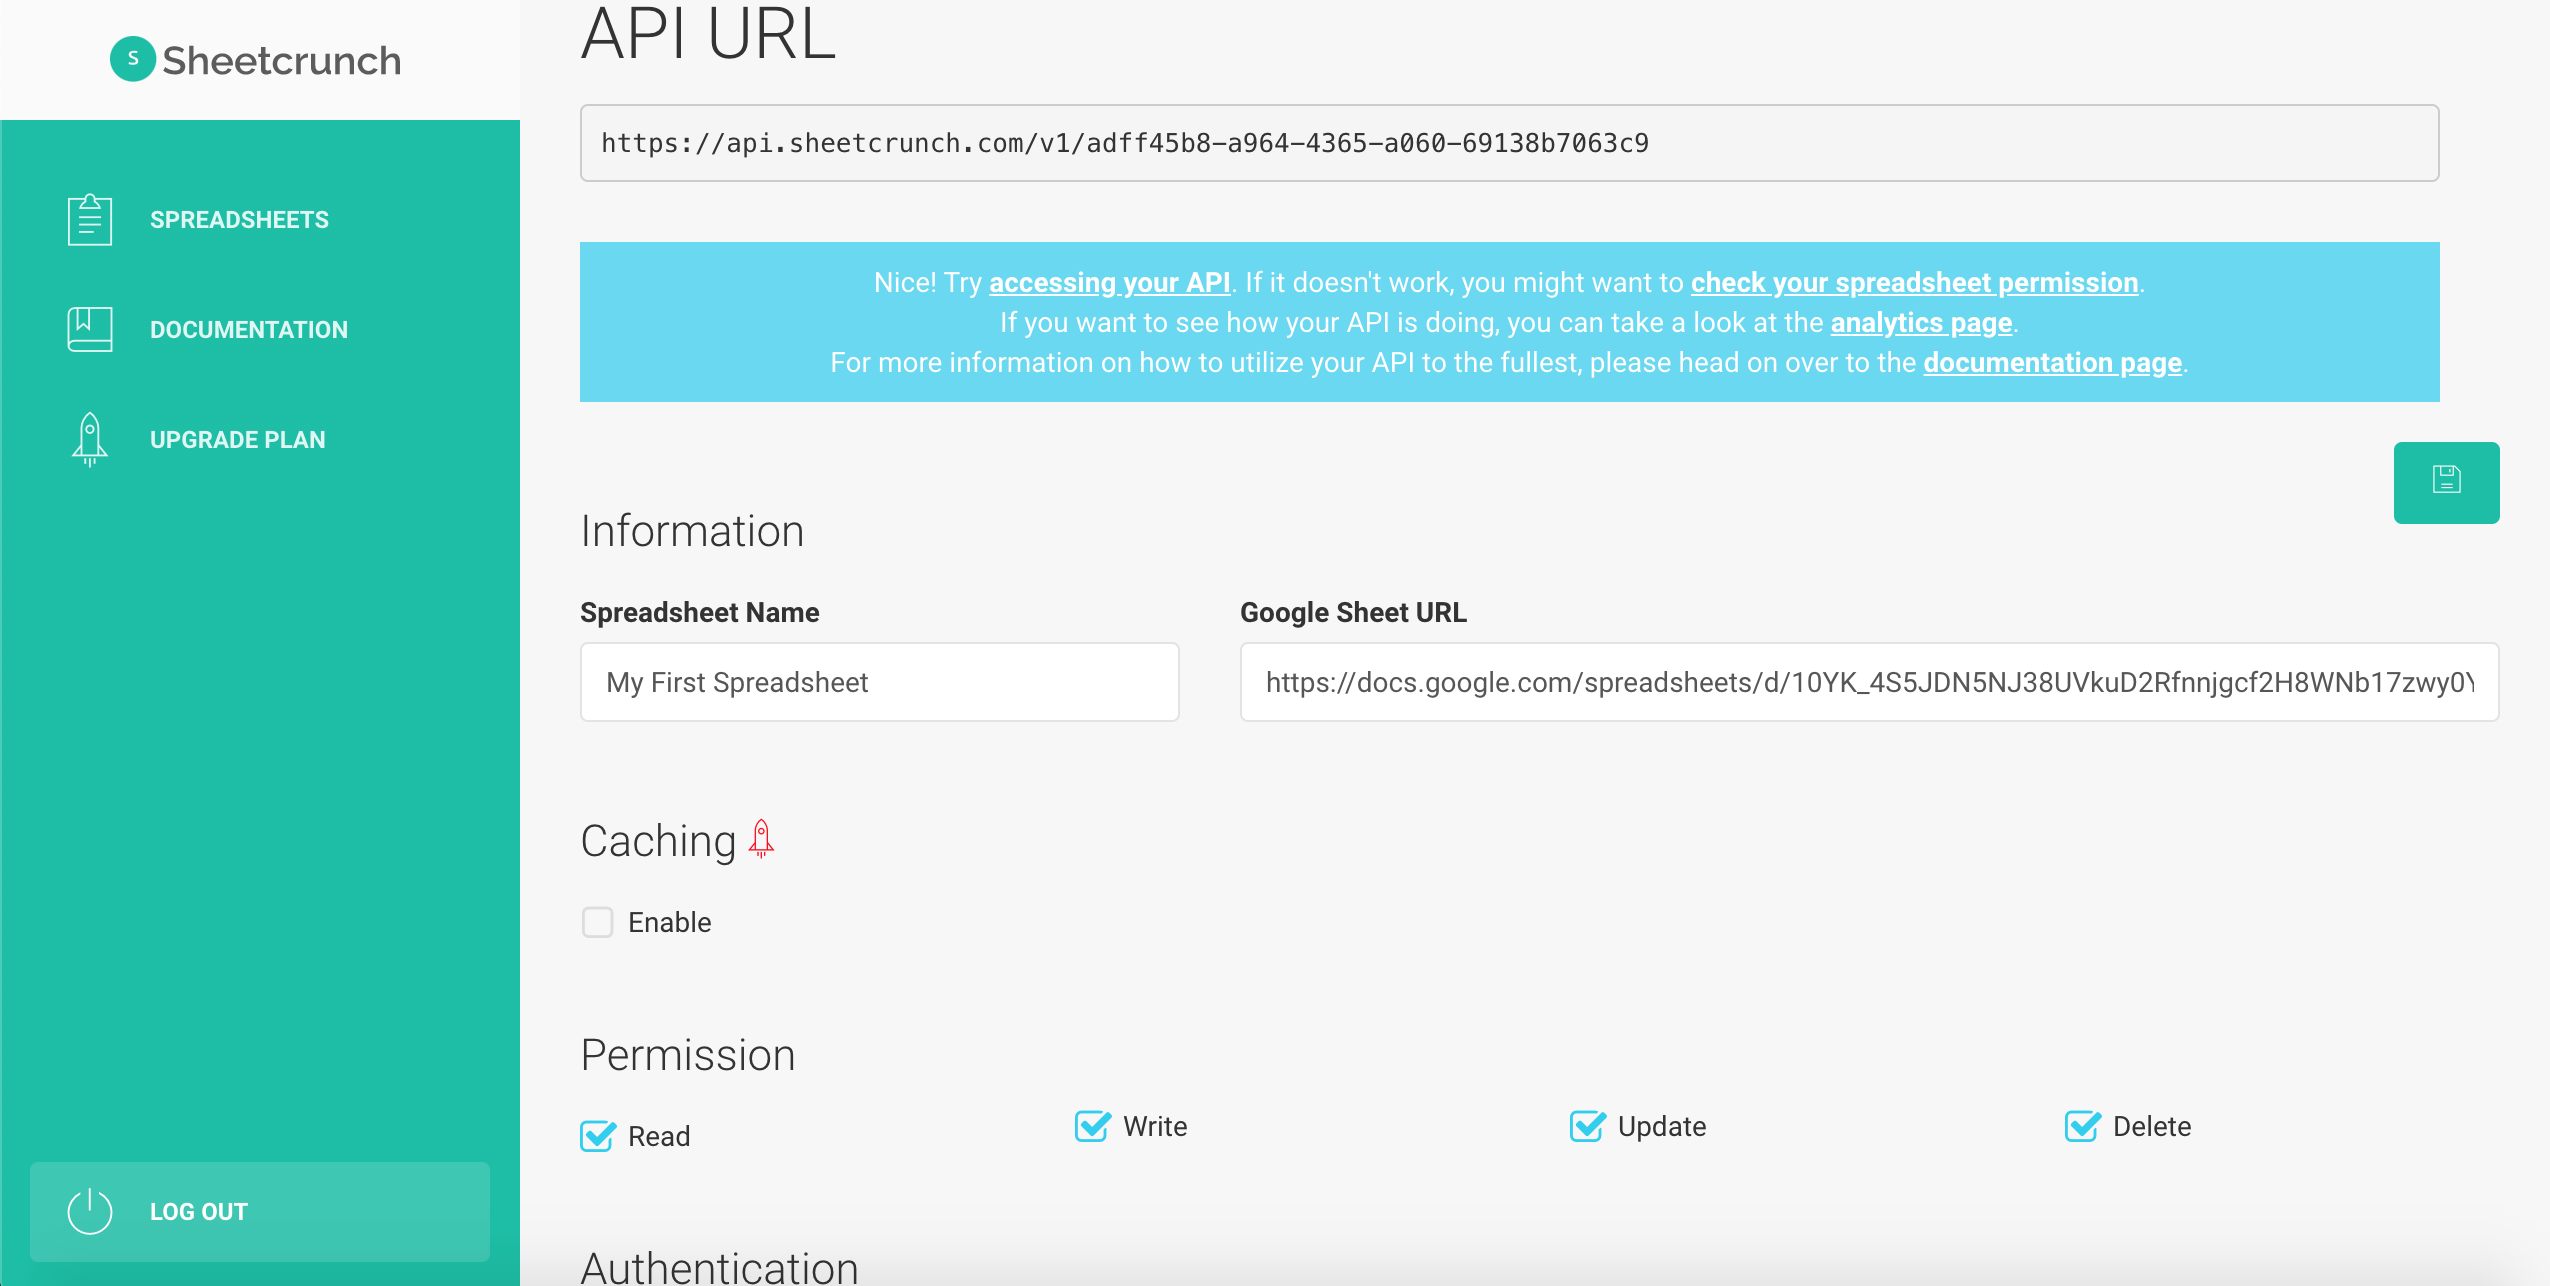
You'll be presented with the home page where it prompts you to upload your first spreadsheet. Input a name for your API, and upload your spreadsheet URL from earlier.
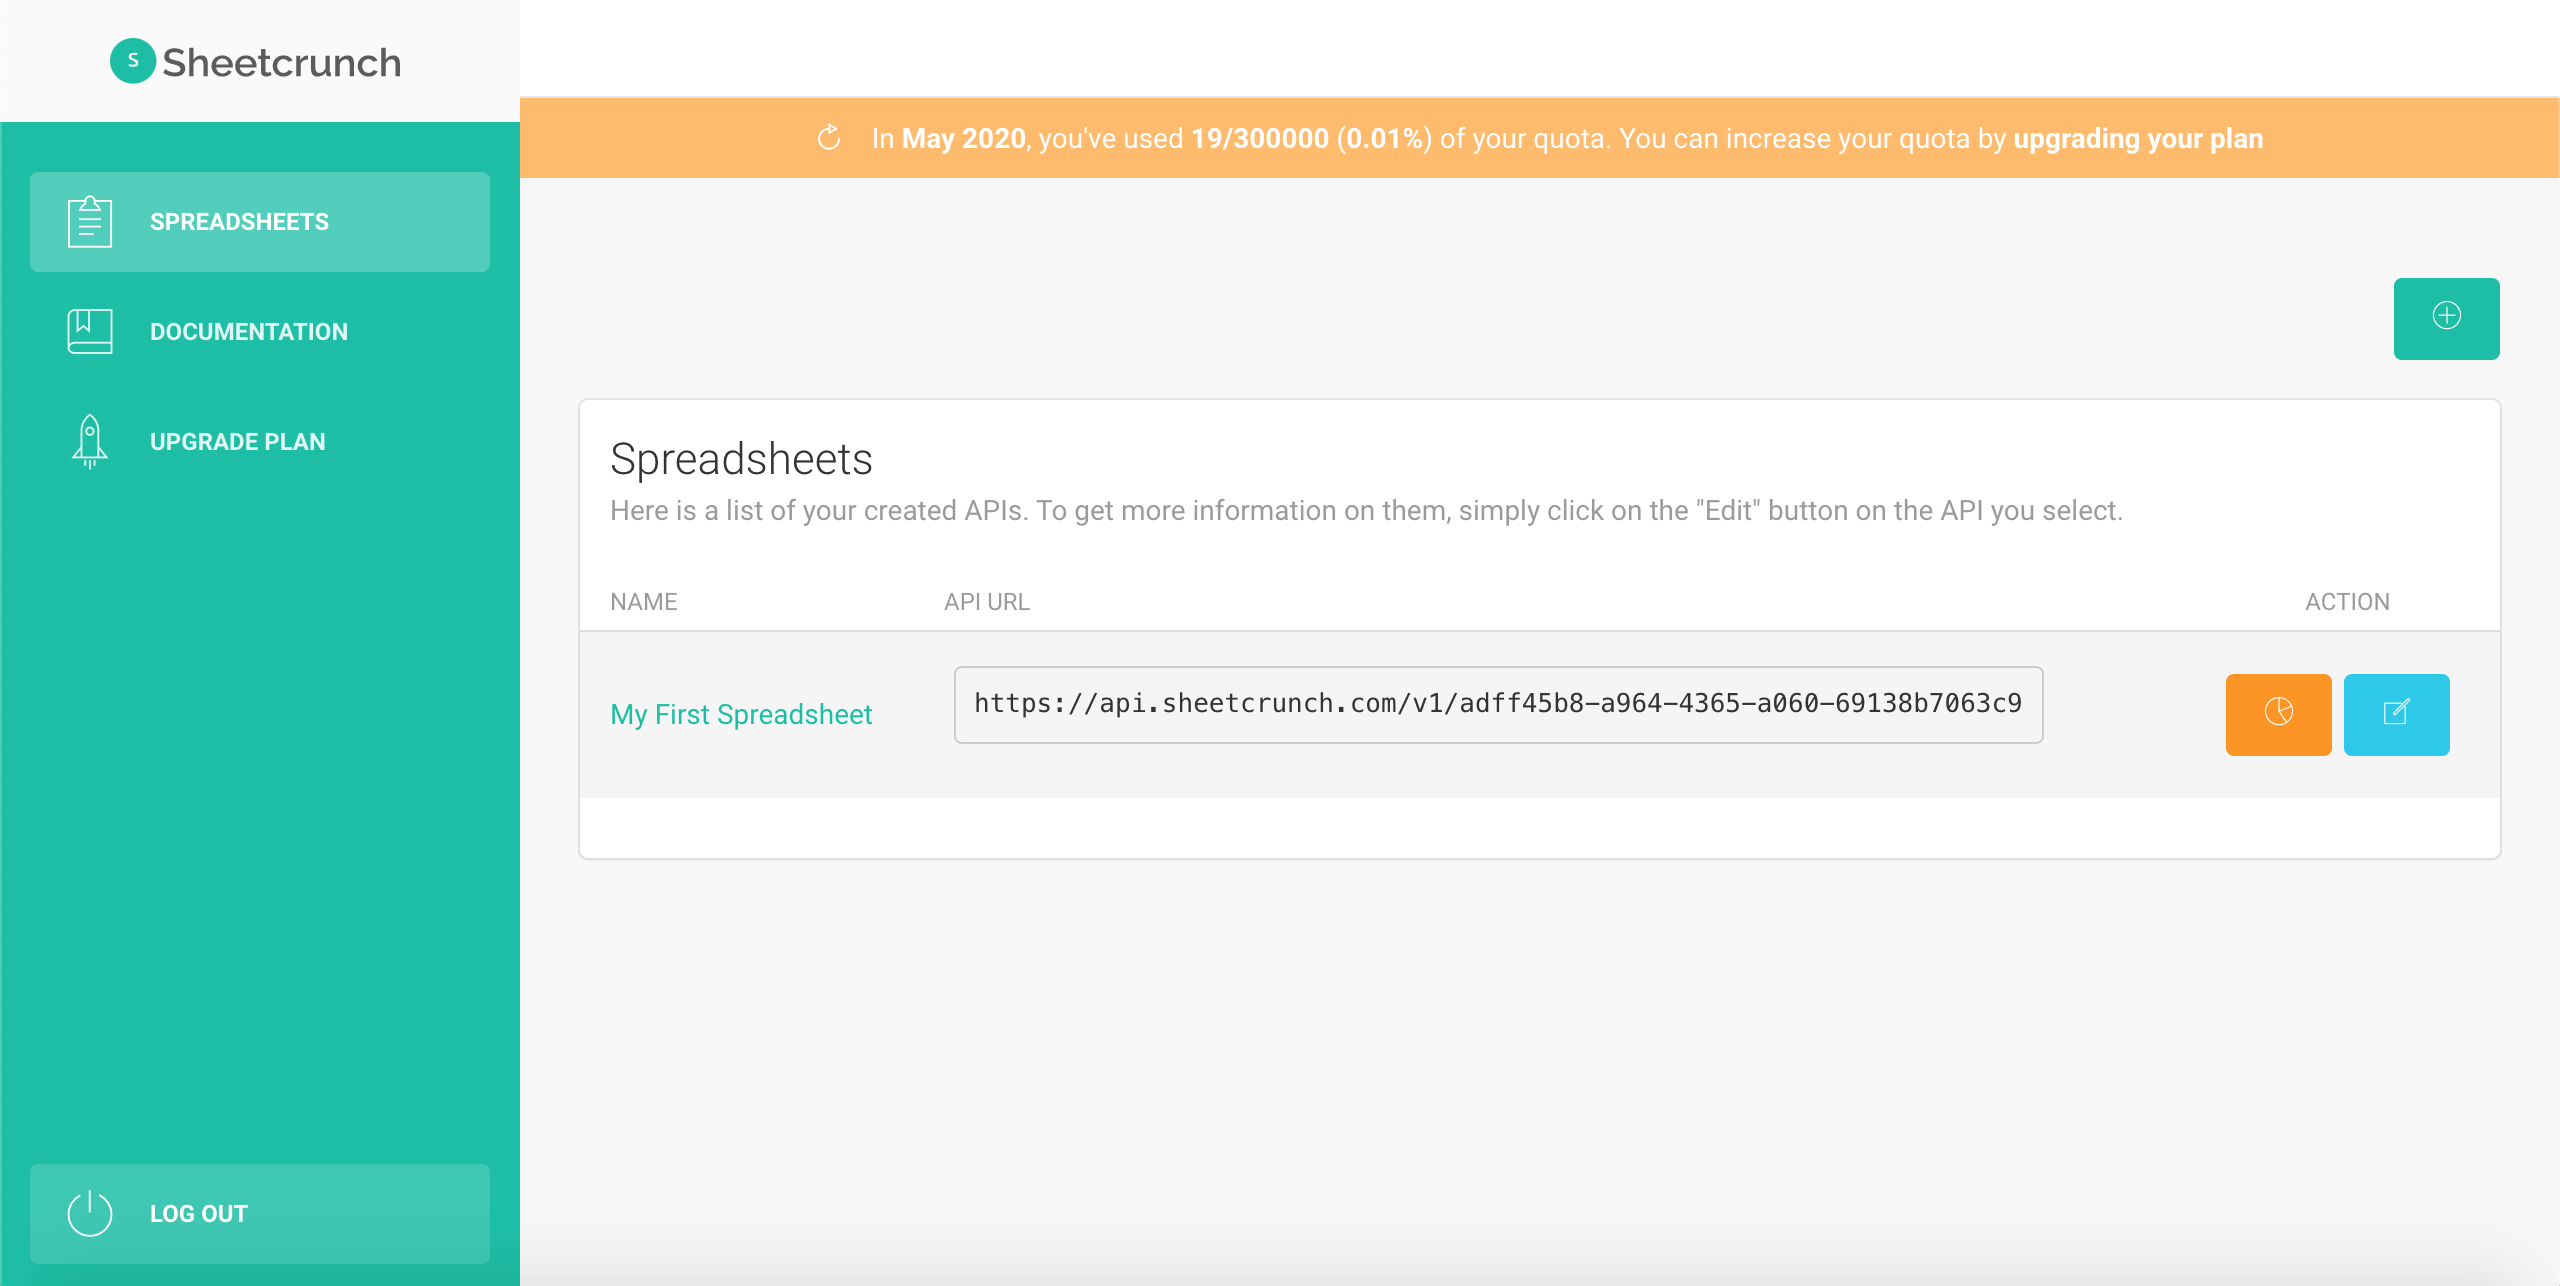
When your spreadsheet has been uploaded successfully, you'll see your first spreadsheet in the table!
That's it!
Now you can start exploring the various features and what you can do with your data.
Head on over to the documentation to get a more information on how to use your new API.
Hopefully, we've helped you understand more, and that you've got your Sheetcrunch API running! If you have any questions, feel free to contact us at [email protected].
Cheers!